Saturday, 10 February 2024
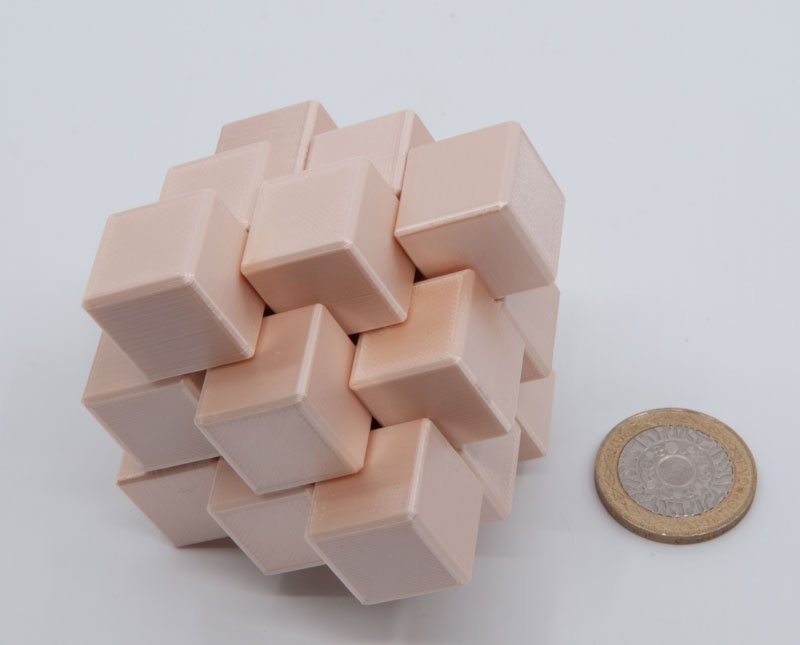
234 Cube Puzzle
Friday, 12 May 2023
Karakuri Packing
Designed by Yasuhiro Hashimoto and beautifully made by Mine, it presents you with five pieces (some of which have holes in them) and two dowels to be placed in a box with a slightly restricted opening. A quick count will convince you that there should be more than enough space in the box for those pieces so it should be a simple matter of working out how to arrange them all inside the box…
And that’s where the fun starts…
I’ve often described the first step in my solving technique as getting myself to the point where I think a puzzle is impossible, and then working out how it might possibly not be… this puzzle did that to me multiple times – and that’s probably the main reason I’m such a huge fan of it – it gives and confuses and then gives again…
Having already established that the pieces should all fit in the box… I set about trying to do just that. Don’t get me wrong, it’s easy to find an assembly that would fit inside the space if the opening weren’t restricted, but that little strip across the top turns out to be quite confounding…
It turns out that the restriction and the shape of some of the pieces means you can infer quite a lot about where some things have to be – and that really feels helpful – only it turns out that it’s impossible to actually put them there and get the rest of the pieces into the box… hey ho – step 1.
At this point I was still swithering between a couple of potential assemblies and trying lots and lots of different things to gradually whittle down the possible approaches – until I was left with only one that I thought had to be the right approach – only there was no way to actually execute the assembly – step 1 - again.Time to think not only outside of the box, but well-differently…. And there lies not only a little madness, but also gold dust it turns out – because there is indeed a way to get around the current blocker in that assembly process… only problem is that another blocker appears almost immediately after that…
Ultimately there is a way to deal with the final hurdle and the pieces just slide neatly into place…
…and when I saw that happen I got one almighty “A-Ha!” buzz that lasted for ages… it’s such a neat little puzzle that makes you Think (c) quite a lot… and as a result it’s become the one I’m currently most enjoying giving to other puzzlers to have a bash at – it is excellent!
Kudos to Hashimoto-san for the design, and thanks to Mine for bringing it to the attention of us puzzlers around the world.
Tuesday, 26 April 2022
Construction blitz…
I’ve always enjoyed assembling kits – before puzzles it was model aircraft and hairy-choppers – those were truly the gift that kept on giving with the need to rebuild and repair when ambition exceeded altitude and airspeed… but having left that hobby behind for a far cheaper one (let’s see if I get away with leaving that one out there) in the form of puzzles, I don’t get my assembly-fix quite as often… I’ve blogged about my Karakuri kits before but recently I’ve ordered a few of the NKD kits and they’ve supplied several weeks of my assembly-fix.
A while back I assembled the Silver City Luxe kit and found the process of gluing the little bits of veneer on at the end really tedious – in the end my copy of the puzzle looked presentable – but definitely not up to close scrutiny – it was obvious that it had been built by someone with more enthusiasm than skillz…
In spite of that I ordered a copy of the Luxe version of the Scriptum Cube and Mecanigma as well… and over the past couple of months I’ve been working my way through assembling those.
The carcasses go together really well – the laser-cutting is all spot-on and very few of the pieces were so tight they needed a bit of fettling. The innards of the Scriptum Cube go together quite quickly and as long as you follow the instructions carefully you should get everything right first time… I ended up with just one bit that (still) doesn’t quite work properly – but as it’s an internal bit that’s only really there to hide some of the guts, I’m not losing much sleep over it… and some point I’ll work out why it doesn’t fit where it should…
Once the carcass is built, you have the joys of the veneer to apply… but this time the good folks at NKD have switched from PVA wood glue to gel superglue – which gives you about 10 seconds to get things properly positioned and apply some pressure to secure it in place and literally 20 seconds later you’re onto the next piece safe in the knowledge that piece isn’t going anywhere fast…. Sure you need to be careful about where the gel goes, but if you’re careful you don’t HAVE to glue yourself to your project – that bit’s optional.
The veneer on this one ended up taking me a bit longer than the rest of the assembly, and once again my copy’s not going to win any beauty contests, but it’s perfectly functional and looks good enough at a distance!
Oh yeah, and it’s a cute puzzle too – obviously if you’ve built the thing, you know exactly how it all works, but I suspect it’ll amuse a few puzzlers when they eventually start dribbling back to Barnt Green at some point in the future.
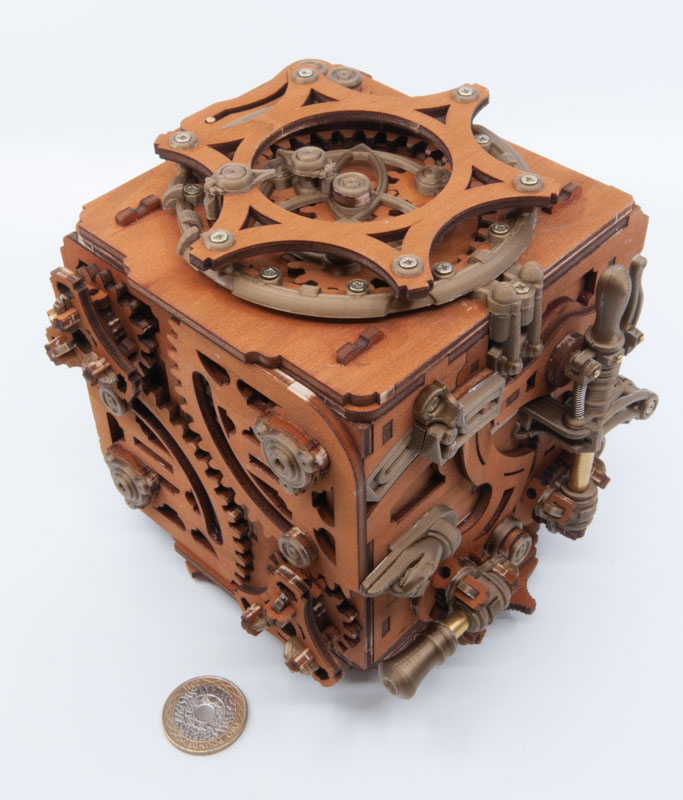
Mecanigma is an interesting combination of some very cleverly-engineered laser-cut ply and lots of 3D printed pieces. You start out by applying several thin coats of wood stain to the ply sheets before starting with creating a huge number of sub-assemblies and the main carcass. Once you’ve used up most of the wooden bits you being to combine the 3D-printed bits and the sub-assemblies into some wonderfully interesting mechanisms…You work your way around each of the faces in turn, pausing to make sure that all of the mechanical bits are working properly and interact reliably with those on the previous sides before moving onto the next side… (Word to the wise: take your time on this bit and make sure the mechanisms are all silky smooth – it’s a LOT easier to do that now than to try and do it when there’s a lot more hanging going off the carcass.)
Again, once you get to the end of the assembly process you’re pretty familiar with the mechanical bits of the puzzle, and you’ll have had to check the puzzle-y bits as well so it’s not going to take you long to solve it – given that all of the mechanics are out there in full view it does make for an impressive mechanical contraption – with a bit of puzzling thrown in for good measure.
If you want a pretty puzzle, give the good folks at NKD your money and get them to build it for you – they’re going to do a better job than most puzzlers I know… but if you need the occasional assembly-fix like I do, then they provide plenty of building pleasure with a good dose of sense of achievement - AND you end up with a puzzle box for your mates to play with.
Yes, I challenged myself to get the word carcass in there 5 times… I’m a bad person.
Sunday, 13 June 2021
Gob Stopper
A few weeks ago one of my regular care packages from Big-Steve was somewhat heavier than I’d been expecting it to be and the cause of said heaviness turned out to be rather handsome brass ball, of sorts. I mean it’s clearly a ball, but it’s also clearly one of their hex thingies. (It’s a technical term, très scientifique!)
Fiddling around with it you’ll find a few bits that you can encourage out and if you’ve been doing your homework properly, you should have a strong sense of déjà vu at this point… proceed with the disassembly and head on over to piece identification and you’ll be able to convince yourself that at its heart, this is the Missionary Position from The Joy of Hex – albeit a Missionary of a somewhat different shape… this one positively rolls with goodness.
Assembly provides a slightly different challenge to the full Missionary given its curves – the full Missionary sits nicely in the stand that the lads thoughtfully provide, but the curves on this little beast make those stands utterly useless – so you are very much on your own with this one. As long as you’re at least a little handy (and some practice does help! As if you needed encouragement…) you should find that you can keep things in more or less the right places until they start to hold together themselves…
When the lads were describing the manufacturing process it sounded like there was a heck of a lot more work involved in making these little guys than their traditional hex puzzles – so much so that there was a time when they were seriously wondering whether it would be worthwhile making these suckers! All of the steps required for the traditional hex puzzles are there, but then they need to be assembled, turned into a ball on a lathe – without the pieces flying apart and killing anyone in the process (that part is important!) – then the pieces each need to be tumbled to knock off the sharp edges that result from the ball-turning-part-of-the-process before they’re finally ready for puzzlers to play with – without shredding their hands to bits.All of the extra steps add significantly to the production time and effort so they do cost a bit more than their more traditional cousins, but they look excellent and play really nicely – and I’m a big fan of the antique-y pre-patinated finish that results from all of the extra work involved - I reckon it looks great!
Thank chaps!!
* If you’re wondering where the name comes from: the lads clearly had learnt absolutely nothing from the whole “Boaty McBoatface” debacle and decided to crowdsource a name for their latest creation using a Facebook group known to be frequented by absolute reprobates (and some puzzlers). The resulting poll, which even allowed for user-additions to the poll (what the heck are these lads thinking?!) duly settled on Ball Locks… one of said user-additions, with Ali's own “Never mind the ball hex” coming in at a respectable third place. The sheer genius was to combine those two and come up with the iconic punk reference that is “Never Mind the Ball Locks, Here’s the Gob Stopper”! There were a number of other excellent suggestions and personally I can’t wait to see what they come up with for “Jane Fondler”.
Monday, 17 May 2021
Cubic Octahedron
Anyone who’s vaguely interested in puzzles and 3D printing
will be aware of the massive contribution that Aaron Siegel has made through his
development of tools and techniques for making 3D printed puzzles that much
more accessible. He’s not only developed some brilliant tools for helping
puzzlers get their puzzles prepped for printing without support, he’s also been
publishing print files for a huge variety of puzzles already in the public domain,
bringing stacks of them to the attention of folks who might not otherwise have
come across them…
One such puzzle is Christoph Lohe’s Cubic Octahedron
which Steve Ali printed off a spare copy for me – thanks (again)!
Mine arrived as a bag of bits from the lads (probably the best way to ship it to avoid the spindly pieces possibly getting broken) so I had an extra little challenge to make sure I’d assembled the pieces properly. Once I discovered letters marking the various joints and realised there was only one orientation for the connectors to join up, I was pretty confident I was connecting the pieces up the right way… although at this point, I didn’t know what the puzzle was so had no idea what the pieces should look like – it added a little extra frisson.
With the pieces built my mind immediately went to a relative of Coffin’s Three-Piece Block – I knew there was a slightly larger four-piece version (I'm sure I have one in wood from John Devost - probably even blogged about it!) but I didn’t think the pieces were familiar so I just started trying to build something vaguely coherent… starting with a couple of pieces to see how they could be combined and when I found something that looked promising, try and introduce a third piece and so on…
I had (quite!) a few false starts (even to the point of wondering if I'd assembled things properly!) before finding something that looked promising – and at this stage I should point out that the whole premise of having these pieces where the joints are all quarter-face and offset makes for a deliciously confounding puzzle – we all know just how confusing Coffin’s Three-Piece Block is with just three, smaller pieces. This one adds a piece and they’re bigger…Right about now I came to realise that Christoph has added a wonderful twist to this genre – Coffin’s originals are serial assembly puzzles – you had to insert the pieces in the correct order but when you got to the end, you simply inserted the last piece… Christoph doesn’t let you do that here… he makes you work some more, even after you’ve worked out where all the pieces need to be and what their relative orientations are – that extra little kick in the pants right at the end really makes this one stand out for me.
It's a great combination of confusing and puzzling!
Wednesday, 22 July 2020
Geneva
William Hu’s been designing interesting interlocking puzzles
for a good few years now – his designs have often involved twists and turns of
the sort that make BurrTools less useful than normal. About a month ago Eric
produced 60-odd copies of Geneva and they didn’t last long.