Saturday 28 December 2013

A quick plug...

[UPDATE - and we're all done at $13,201 ... ]   

[Pic courtesy of the Stickman.]
...for an awesome project from some of my puzzle-buddies. 

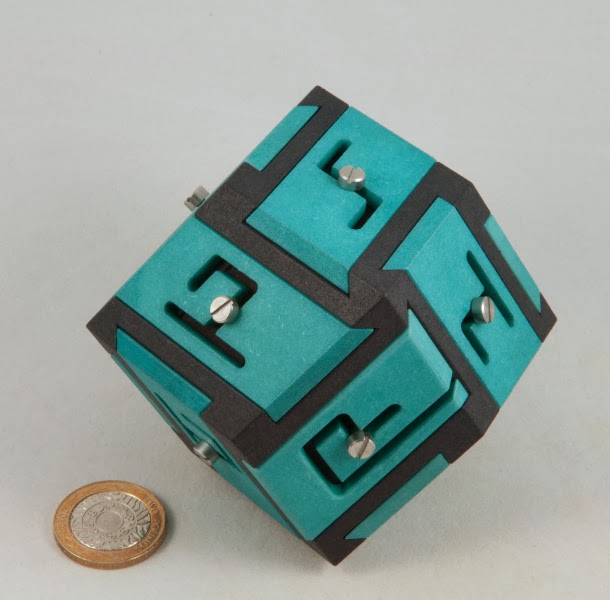
Just in case you haven't already seen this, and you're a fan of puzzle boxes - this is without a doubt the single-most-epic-puzzle-box-you-will-ever-find.Bar none. 

As I write this the bidding has gone past $10,000 ... and it's still a bargain, albeit one my bank manager won't allow me to enjoy! If you don't have an account set up yet, Nick will be glad to oblige  ... Oh and by the way there are some other little things on sale too... [at puzzles.baxterweb.com]


The Stickman Apothecary Puzzlechest is a realized vision, over 4 years in the making, with the goal of representing an entire era of some of the best puzzle designers and craftsmen from around the world.  Twelve prolific artists from 5 different countries participated in orchestrating its creation.  Each drawer within has been quality hand-crafted to exhibit the best abilities and individual styles of these artists.  

The chest itself is also a complex mechanical puzzle.  The solution of individual puzzlebox drawers is required to obtain mechanical parts, and these are required to progress its sequential movement.  Within the chest, mechanical pistons lock drawers into place while still allowing them to slide freely.  Pushing in on a drawer causes others to automatically extrude from the chest.  And in turn, pushing those drawers back causes yet other drawers to come out in an apparently random fashion.  Deducing the pattern and sequence of drawer movements is part of the puzzle to this chest, as drawers can only be released under certain conditions.  Once a puzzle drawer has been removed and solved, pressing it back into its slot will automatically re-engage it into its locking mechanical piston.  

Enough cannot be said about the puzzle drawers designed by contributing artists; many of whom have received awards for their abilities.  The only restriction placed upon designs was the size of the puzzle, which required parameter sides of 3” just to fit into the chest, (some puzzles are 3” cube and others measure 3” x 3” x 4”).  The goal was as to require minimal restrictions in order to ensure the true flavor and style of each artist.

[Pic courtesy of the Stickman.]
The designs of puzzlebox drawers vary from the seemingly simple to exhaustingly complex.  Some require just a few profound and elusive steps, while others require moves going into the hundreds.  Many of these puzzles are exclusive to only this chest, or significantly limited in production, and are therefore rare.  With such diversity in complexity, concepts, and styles, there is something appealing to everyone in this chest. The chest is crafted from quality sapele wood, decoratively accented with purpleheart inlays, and measures 18” x 16” x 12”.  It rests up on a base of intricately carved wooden feet and comes with a 15-page, fully illustrated instruction book.  All drawers have been signed and numbered by each artist. 

Originally, the only way to obtain one of these chests was to be an artist contributing to the project, and none were intended for public sale.  However project bylaws have since been expanded, now allowing for two additional copies to be sold at auction to help cover expenses.  Stickman Apothecary Puzzle Chests are limited in edition to only 15 completed copies, and this particular chest is #15 out of the limited edition set.

...and Rox has an even better write-up over here - with more pictures!!!

Tuesday 24 December 2013

Christmas Challenge

Fancy yourself a bit of a puzzle-spotter?

Up for a challenge?

OK - I think there are 53 recognisable puzzles in this picture - how many  puzzles and their designers can you correctly identify? I'll rustle up something puzzling as a prize for the first person who gets them all right ... or for whoever comes closest - enjoy - and Merry Christmas!


allard

Click on the pic for a larger view

Monday 23 December 2013

Rhombic Maze Burr


Derek Bosch had a prototype Rhombic Maze Burr (RMB from here on, 'cos I'm lazy!) on his table at the IPP32 Puzzle Party. He was demonstrating it to anyone who was interested and letting them have a shot at it … and then he had a sign-up sheet for folks who might just be interested – I played around a bit and duly added my name to the list, and earlier this year, Derek got in touch to say he had a couple and asked if I was still interested … and a little while later it arrived. :-)


The RMB is Derek’s development of Kagen Sound’s (Schaefer’s in old money) Maze Burr. Kagen’s Maze Burr has maze plates spread around the faces of cube while Derek’s RMB has maze plates on the faces of a rhombic dodecahedron (the clue’s in the name!) … so there are double the number of maze plates to negotiate. The guts of the RMB and the maze and pin plates are all 3D printed and then treated with some Bosch magic-sauce to make them slide nicely. (I may have lied about the magic-sauce, but the pieces all move really nicely so I suspect he's done something to them!) A set of stainless steel screws keeps the plates in the right places and forces you to navigate the maze.

As with the Maze Burr, the RMB’s maze plates can be rearranged to change the depth of the solution required … and with twice as many plates, you can get some pretty high level configurations … my RMB arrived with a (mercifully low) solution of around 30-odd moves – and the booklet that Derek provides with the RMB includes 50 challenges ranging up to a 379 move monster set up … presumably for people he doesn’t like very much!


One of the maze plates is unique in that it has an exit off the plate, which, when the pins are in the right orientation, will allow that plate to slide out entirely – that is your goal. The exit plate is also the only plate that will be able to move at the start, albeit in the “wrong” direction. 


Moving the first plate exposes a gap for the adjacent pin-plate to slide out, which in turn allows the maze plate to slide… and so on… a couple of the maze plates have hook-shaped channels that allow you to move a panel and then immediately retract the pin plate you moved to allow that move … and sometimes that can be very useful – as it effectively allows you to fork down a different branch (if you’re thinking about your path as a tree structure). 


The RMB comes in two sizes – I went for the larger of the two and I reckon it’s a nice size to play with in the hand – it’s a nice handful. :-)


Once you’ve solved a particular challenge, a few minutes with a screwdriver and you’re good to go with another challenge – I’ve worked through a couple of the simpler ones so far and they don’t have that many dead-ends or forks in the road, so it’s not easy to get totally lost on them. 


Every now and then I’d find myself benefiting from trying to work back from the exit though… although sometimes, if you haven’t noticed a fork in the road, or find yourself down a blind alley, you just end up convincing yourself there is no solution… and several times I’ve ended up with an odd panel or two sticking out with no apparent way to get them back in again… 


I reckon it’s a great development on the theme and the extra panels provide a suitable step up in terms of complexity – and it’s fun to sit and fiddle with! Even the “simpler” challenges aren’t trivial … Nice one Derek!


Sunday 15 December 2013

Kumiki Airlines


One of my favourite puzzles from this year’s Edward Hordern Puzzle Exchange came from Brian Young – aka Mr Puzzle. Brian and his exchange assistant, John Moores, were roaming the exchange room with a sack-full of these little guys and while Brian was giving you the schpiel about the puzzle, John fished around in his bag of tricks and produced a personalised boarding pass for each exchange participant, along with a complimentary air-sickness bag … actually, the former and the latter were in fact the same thing. The front of the bag has the boarding pass printed on it and the back of the bag has the following disclaimer on it: “Kumiki Airlines SICK BAG / Puzzle at own risk / Please do not remove from the aircraft … (unless it has been used)”.
Brian was dishing out the little aircraft with their wings on backwards and their tail planes somewhat misshapen. The challenge was merely to reassemble them in a slightly more aerodynamic manner … but they come with a health warning ... and a sick bag …
Right, so the clue’s in the name – it’s a Kumiki puzzle, yeah? 
Well, maybe … maybe not … fiddle with this guy for even just a few minutes and you’ll pretty quickly convince yourself this is no straight-forward Kumiki puzzle! 
Look a bit more closely at the middle of the body and you’ll see a the two wing bits wrap around the two engine bits, that in turn enclose the two fuselage pieces and they in turn trap the two wing bits … 
HANG ON! This isn’t a Kumiki puzzle, it’s a blimming burr! A burr with a couple of rather long pieces which happen to have a restriction in their relative movement thanks to a pair of pieces trapped at their one end (aka the tail plane).   
I didn’t spend much time on this puzzle in Japan, leaving it until I got home to have a serious go at it – and that was probably a good decision. Taking the plane apart wasn’t that tricky, and working out where you want the various pieces to end up is reasonably straight forward as well – everyone knows what a plane looks like after all … there a couple of bits that have potentially more than one final resting place, but it always feel like you have a reasonable chance of solving this puzzle… 
The penny drops … albeit slowly – this is a rather nasty little burr – and the clue to that should have been in the name of the designer, not in the name of the puzzle – this puzzle is from the rather fruitful mind of Junichi Yananose – and it’s actually a level 13.4 burr ... (!)
Thankfully, I hadn’t realised that it was a level 13 burr so I continued to think I might actually be able to solve this puzzle. (I’m rubbish at complicated burrs! – If it weren’t for BurrTools, most of my collection would look like a selection of bags of notched sticks!) I ended up spending a couple of hours, spread over a few weeks, getting annoyingly close to solving this puzzle – I’d invariably end up with one half of the tail plane in just the wrong place with no way of manipulating the rest of the pieces in order to manoeuvre that last bit into the right place… it felt like ages playing around with variations on that theme but somehow I always ended up with that one piece stubbornly refusing to get into place.
After a bit more head-scratching I went looking for an alternative starting point and managed to find a slight variation on my tried and tested (and wrong!) approach which allowed a few extra sorts of moves along the way, and with a little experimentation, managed to find a way to achieve aerodynamic perfection.
Looking back on what I was doing, it seems pretty obvious that I was trying the same thing over and over in the hope of finding a different outcome (Yip, I know that definition!) – and it was only when I noticed that there were some features of the pieces that I hadn’t actively used yet in my assembly process, that I realised I was missing something important … nothing’s there by accident – this is a great design. 
Brian’s website still has these puzzles listed and I heartily recommend them – don’t think of them as a level 13.4 burr, think of them as a tough Kumiki puzzle, and if you’re like me (an AMATEUR!) you might stand a better chance of conning yourself into solving it.